Filed under: printmaking | Tags: art, artist, CMYK color model, Halftone, printmaking, visual art
It has been brought to my attention that I might want to describe the process for the pronto prints of my previous post. Makes sense! So, here it goes:
1. Pronto plates work by having ink stick only to the marks on the plate (not the blank parts of the plate). The ink only wants to stick to distinctly black marks on the plate…no greys. So, think of a black and white photo…there is a lot of gray in there, right? Well, you can’t use that black and white photo as a basis for a pronto plate. The ink will not adhere to the grey areas.
2. In order to create the illusion of greys, one has to convert the photo to a halftone. In a halftone, the entire image is composed of dots. In darker areas, the dots are more dense, in lighter areas, the dots are smaller and fewer. So, the dot itself is not grey…it’s black, and the ink will stick to it. It’s the density of these dots that creates the shading. Think of a newspaper image…
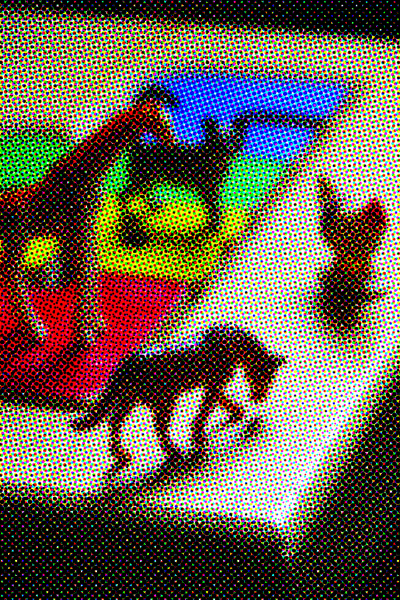
3. As I was not doing a black and white image, but a color image, I needed to create a halftone of each process color used to make the image. For printing, the process colors are cyan, magenta, yellow and black (K). This is different than the colors for your monitor, which are RGB (red, green, blue). So, I created a halftone image for each color…and when you layer them all together, it creates the illusion of a shaded image. Here is a closeup of the horse:

You need to have photo editing software to both create the halftone image, and to separate the original color photo into each of the four “channels”, CMYK. So, for this image above, you can see the cyan dots, magenta dots, yellow dots, and black dots. The patterning of these dots creates the image below:

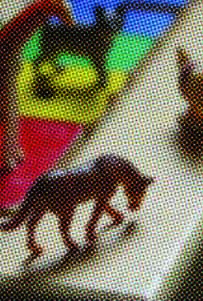
You can control how large the dots are. The larger the dots, the easier time that the ink will have sticking to the dots…but the more abstract the image will be. Here is how the image would look if the dots were big…

This is a digital image, not an actual print from a pronto plate. So…you have to decide what look you’re after. Also, you have to see what works best with the pronto print process. You might like very fine dots, but perhaps the ink won’t stick well to tiny dots. I’m still figuring out what I think looks best. Clear as mud? 🙂
